A few weeks ago I decided to organize our pantry. I'd had it with not knowing what was going to fall on my feet or head when I opened the cabinet. Ever go to the market and continually buy brown rice or your favorite snack only to realize you already have 3 boxes sitting in the back of your pantry? I know this has happened to you..it's okay...we don't judge here.
So began the pantry makeover. For this project, I got inspiration from various blogs, and the Container Store became my haven. Here are the steps to my pantry makeover project. But first...
The Before Picture:
I am seriously embarrassed. And this is only two shelves. Getting hives just looking at the clutter! Here is how I tackled this disaster...
Pretty Penny Pantry Makeover
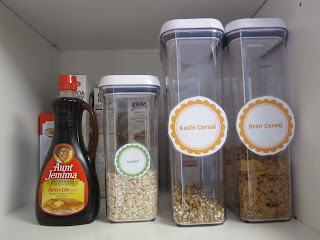
Step 1. I made a list of items that we use on a regular basis like pasta or rice. I then went to the container store and got amazing
food storage containers, as well as a soda can holder to use for canned food, and other open containers. The storage container are great because they seal your food in and keep it fresh.
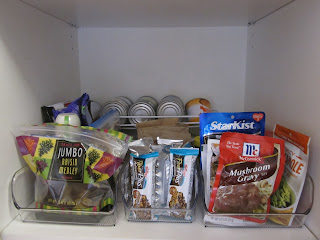
Here is an example of one of the open containers:
Step 2. I used these great
label templates from the Better Homes and Gardens website. I printed, cut, and had them laminated. I stuck them onto my containers with tape. I used my label maker for the smaller containers.
Step 3: I took everything out of the cabinets and put all items on my kitchen counter. I then tried to group things according to categories (snacks, breakfast, grains and rice, etc.) This is a great time to throw things away that you don't use or that is expired. Organizer junkies call this "purging".
Step 4: I filled my containers with all of our essentials, and slowly started to organize each shelf. It is kind of a trial and error process. Here is the end result!!
After buying all of the containers and getting the labels ready, the organization part only took about an hour. This is a very doable project. Have a happy Saturday :)
xx,
Pretty Penny


